DDG search drop in powered by ddg.patdryburgh.com
tl;dr - I installed Kubernetes on Ubuntu 18.04 LTS via Ansible (kubeadm under the covers) on a Hetzner dedicated server. Before doing so, I debugged/tested the playbook in a local VirtualBox VM with a fresh Ubuntu install before attempting on the dedicated hardware. There’s a [gitlab repo (ansible-hetzner-ubuntu-1804-k8s-setup)][gitlab-repo] that contains a copy-paste job of the finished work – the idea is that you should be able to run that playbook and go from a fresh Hetzner dedicated Ubuntu 18.04 LTS server to a single-node kubernetes cluster (WARNING: the code in the gitlab repo is an approximation of the working code I actually use, I may have overlooked a few copy paste errors/missing details, [YMMV][ymmv]).
At this point, I’ve installed Kubernetes close to 4 times on different distributions and using different methods – I’ve done the hard way, kubeadm, and installed on CoreOS Container Linux and Arch Linux. Recently, I ran into a bunch of problems trying to get untrusted workloads (AKA using VMs for pods) working on Kubernetes on container linux (blog post incoming, sometime after this one). While I love container linux for it’s minimalism, the lack of support for virtualization programs/features like qemu, LXD, and ultimately kata-runtime (though I made a valiant effort at statically compiling and running it) made me start to look to better fertilized pastures. The [acquisition of CoreOS by Redhat][coreos-redhat-acquisition] this year means that [CoreOS Container Linux will be rolled into Openshift][coreos-rolled-into-openshift] by merging with Redhat’s Atomic Project, which looks like a good tool, but OpenShift is too heavy for me, and it seems like they’re about to systematiclaly strip the minimal-yet-sturdy-ness that brought me to Container Linux out of it.
I’ve used Ubuntu both as a server distro and a home distro in the past, but became prejudiced against it over time, thinking it was too heavyweight/bloated. Of course, the answer to that in the server context is Ubuntu Server, and after some convincing from some friendly HNers (particularly praising the tireless contribution of Mark Shuttleworth himself), I decided I needed to give it a try. Ubuntu is often the default distro considered when reading documentation online, and it certainly has easy access to the features I need to power my untrusted workload (VM-level-isolation) ambitions.
I’ve mentioned previously my love of Hetzner and I’ll say it again here – they’re an excellent dedicated server provider, with a great amount of functionality included for a really cheap price. The Hetzner robot marketplace singlehandedly changed my idea of how cheap dedicated hardware could be and I’ve found that it’s been a great purchase. I still keep a VPS with a different provider, but now whenever I look for dedicated hardware providers, Hetzner is the bar I evaluate them against.
I thought this was worth sharing because I decided to take a more cautious approach than I usually do with my small island of infrastructure – I decided to prototype my Ansible playbook on a local VirtualBox VM this time, instead of just clobbering everything and starting from zero. The most careful way I could (and should, which we’ll find out later) have done this was to both prototype the ansible playbook and stand up a completely separate machine, and use kubectl drain to move the appropriate workloads over… I didn’t do that, and I suffered a bunch of downtime on the tail end (issues with post-setup of the actual cluster, the prototyping actually went really well). The rest of the post is an account of how things went.
Since I’m currently running one “production” application, [techjobs.tokyo][techjobs.tokyo] on my super small cluster, of course it was necessary to do some backing up of the data that was already on it. I took some time to write a small script that leverages kubectl to get the data out of the container, that others might find useful. The project is very simple and actually uses SQLite as the backend (how many times do you actually need more than SQLite can offer?).
I’m not using any advanced features like the new-ish SQLite backup API, sothe script is simple dump-and-transfer:
#!/bin/sh

KUBECTL=kubectl
NAMESPACE=your-app
SEARCH_TERM=your-app-backend-

CURRENT_DATE=$(date +%Y-%m-%d_%H-%M-%S)
IN_POD_SQLITE_DB_PATH=/var/data/your-app/jobs/db.sqlite
IN_POD_USER_GENERATED_CONTENT_PATH=/var/data/your-app/user-generated-content
IN_POD_DUMPED_DB_PATH=/tmp/${CURRENT_DATE}_sqlite_dump.db
REL_BACKUP_DIR=../secrets/backups/raw_backup_${CURRENT_DATE}
ZIPPED_BACKUP_PATH=../secrets/backups/backup_${CURRENT_DATE}.tar.gz

# Get name of the backend pod
echo -e "searching namespace [${NAMESPACE}] for pods containing '${SEARCH_TERM}'..."
POD_NAME=$($KUBECTL get pods -n $NAMESPACE | grep $SEARCH_TERM | cut -d' ' -f1)

if [ -z "$POD_NAME" ]; then
  echo -e "ERROR: failed to find pod matching name '${SEARCH_TERM}' in given namespace [${NAMESPACE}]"
  exit 0
fi

echo -e "found pod name [${POD_NAME}]\n"

# Create the backup directory
echo -e "creating directory for backup [${REL_BACKUP_DIR}]\n"
mkdir -p $REL_BACKUP_DIR

# Back up (dump) SQLite DB
echo -e "\nbacking up SQLite data from in-pod DB located @ [${IN_POD_SQLITE_DB_PATH}]"
$KUBECTL exec -it $POD_NAME -n $NAMESPACE -- sqlite3 ${IN_POD_SQLITE_DB_PATH} ".backup '${IN_POD_DUMPED_DB_PATH}'"

# Copy out SQLite DB dump
echo -e "copying out backed up SQLite DB..."
$KUBECTL cp -n $NAMESPACE $POD_NAME:$IN_POD_DUMPED_DB_PATH $REL_BACKUP_DIR/db.sqlite

# Copy out user generated content
echo -e "\ncopying out user generated content from pod @ [${IN_POD_USER_GENERATED_CONTENT_PATH}]"
$KUBECTL cp -n $NAMESPACE $POD_NAME:$IN_POD_USER_GENERATED_CONTENT_PATH $REL_BACKUP_DIR/user-generated-content

# tar & zip the result
tar -caf $ZIPPED_BACKUP_PATH $REL_BACKUP_DIR
A few things you might find interesting about the script above and the context in which it’s run:
<project>-infra repository, using the makeops/makeinfra pattern I’ve written about previously.-infra repository itself, making use of git-crypt to encrypt each backup (along with other secrets).While it would have been great if I could use the VolumeSnapshot API, it hasn’t quite landed yet, and I didn’t want to make a relatively simple dump-job too much harder given that I had much more ahead.
As always, my first step was making sure I understood enough to be dangerous about the things I was about to touch. If you’re new to these technologies, here’s a rundown of the bits and what they’re doing/why I’m using them:
I can’t say that I particularly skimmed a few specific manuals, since I’ve used all these things/tools before, but just in case you haven’t, it might make sense to read up on some of them.
Since we’re going to be developing the Ansible playbook by executing against the VM, the first thing we should probably do is get the VM setup. Rather than getting a pre-baked image, I grabbed a copy of the install CD (.ISO) from the [Ubuntu Server download page][ubuntu-server-download]. If you’re not familiar with what an ISO is check out the wikipedia entry on it!.
The next step is to create the VM that will run Ubuntu server – here’s what it looks like to create a machine from scratch with Virtualbox:
The recordings were (clumsily) done with [vokoscreen][vokoscreen], it’s an amazing screencap tool – [download][vokoscreen-download] and [donate][vokoscreen-donate] if you can afford to!
After that, the machine is created (but not started), we need to go into the machine settings and get at the storage settings which should contain a virtual device that acts like a CD drive for the virtualized machine.
You’ve likely surmised by now that we’re going to boot up the system as if it was a new physical machine, with a Ubuntu install CD in the tray. Let’s load the install CD we got from the [Ubuntu Server download page][ubuntu-server-download] and start the actual machine – you should next see the Ubuntu installation process!
And after starting the machine, you should see (after some loading):
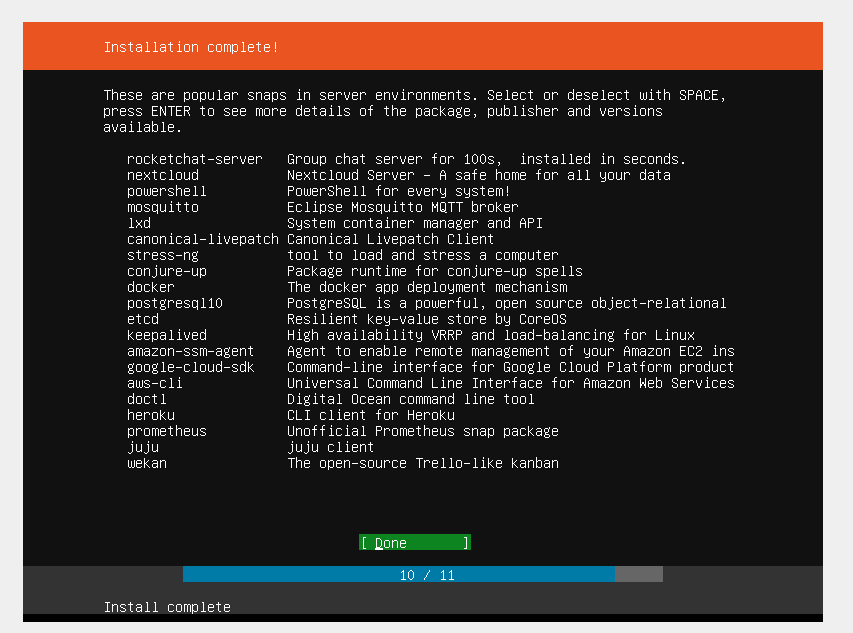
It’s been a while since I’ve installed Ubuntu, since I run Arch on my own personal computer and in a cloud environment am usually dealing with a machine with the OS pre-installed, but I was seriously very impressed with what the Ubuntu installation process looks like now. It’s always been the most polished I’d seen, but it’s been simplified and was a joy to work through – no useless questions, and I felt like I made the important decisions that are normally necessary @ OS install.
[VT-x][vt-x] features were for some reason not turned on for my processor in the [motherboard BIOS][bios]. This meant restarting, pressing delete/f2 at the right time, and heading ot the advanced settings in order to turn it on.
Before I realized it was turned off, all I could see in the VirtualBox machine select/dropdown was 32-bit distributions of whatever machine I wanted to install (e.g. “Ubuntu 32-bit”), which was weird to me (my processor is 64-bit) but I didn’t know why at the time.
At this point you should be staring at a prompt in your VM (hopefully you picked a good username and maybe even imported your SSH keys during setup) – the next step was to get my host machine talking to the VM so that I could use ansible to issue build commands over SSH. If you didn’t import SSH keys from Github during Ubuntu setup, you’re likely going to need to set up ~/.ssh/authorized_keys for whichever user you created, so you don’t have to use password login (which is relatively insecure so you should get in this habit anyway). If you know that your production system will be password-protected rather than SSH key protected (it shouldn’t be, honestly), then I guess you don’t have to worry about SSH keys.
Before I jump into what I had to do to get my host talking to the local VM, it’s important to state that AFAIK VirtualBox by default sets up a [NAT’d][wiki-nat] network connection for the virtual machine (“guest”) that’s been started. By default, the VM will share your host computer’s internet connection – so commands like apt should work without much fuss. By default, there doesn’t seem to be a way for your host machine to access the guest machine (the VM) – which I assume is on purpose (more about this later).
It wasn’t immediately clear to me how to access a VM from the host machine that it was on, and more particularly, what address the machine was given by VirtualBox in the first place. I had to main questions:
At the end of the day ansible (and it’s SSH connection) gets pointed at an IP address – the machine they’re meant to be influencing which you’ve already installed SSH credentials on. My first stab at figuring out what this IP was supposed to be was running ifconfig and ip addr, the latter using the new ip tool that’s becoming the standard across most (all?) distributions. After running these tools, I could look for inet addresses and see if any of them were pingable from the host machine.
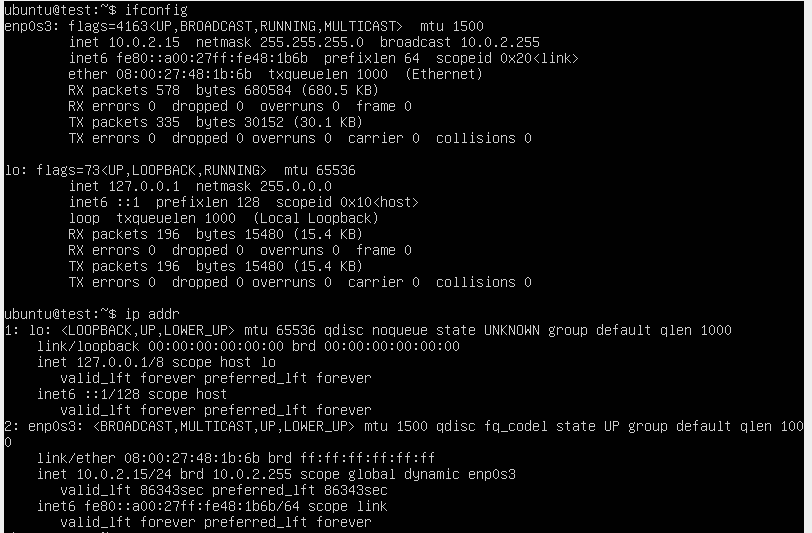
At this point I didn’t realise that by default there wasn’t a way to access the VM from the host machine, but later I realized that the address you see from the VM are the addresses that the VM thinks it has – VirtualBox is determining/managing these. If you try SSHing using one of these addresses (in my case 10.0.2.XXX for the VM) from the host, it won’t work. I did figure out what address the VM has, but turns out this wasn’t really the right question per say.
At the time, my understanding was that since Virtualbox is managing the address that this machine thinks it has, surely Virtualbox holds the key for accessing the VM (obviously). Digging around the networking settings for Virtualbox, at first I tried to add another network device, this time a “Host Only” network device, then tried to access the IP I created in the Virtualbox network management tool, but none of that worked.
I later came upon an excellent StackExchange post that made it somewhat clearer, introducing a better summary and understanding of Virtualbox’s internals:
VirtualBox will create a private network (10.0.2.x) which will be connected to your host network using NAT. (Unless configured otherwise.)
This means that you cannot directly access any host of the private network from the host network. To do so, you need some port forwarding. In the network preferences of your VM you can, for example, configure VirtualBox to open port 22 on 127.0.1.1 (a loopback address of your host) and forward any traffic to port 22 of 10.0.2.1 (the internal address of your VM)
This way, you can point putty to Port 22 of 127.0.1.1 and VirtualBox will redirect this connection to your VM where its ssh daemon will answer it, allowing you to log in.
- michas @ stackexchange
So as you can see, what I really needed was [port forwarding][wiki-port-forwarding] on the Virtualbox side. Here’s how to get to it:
After clicking the button a small dialog appears and you can enter some information about the port forward you want to set up. This is much like how you would set up port forwarding for a router. Here’s what it looks like when you add a rule, particularly for SSH:
Note that I used 127.0.1.1 (not 127.0.0.1, which is the loopback interface for your machine, the “host”). I find this address nice and easy to type – 127.0.0.2 might also have been a good choice.
Note that you can’t use the same port as the actual service – use something like 2222 on the host (your computer) and map it to 22 on the guest (the VM). Your host has likely reserved 22, and Virtualbox will happily fail silently if the setup is invalid. Also, on the guest side, 0.0.0.0 (all interfaces) will work, but 127.0.0.1 will NOT work – the loopback address can’t be routed to in that manner, although it feels like all the tools are there to make that possible (complete control over the VM, etc).
After setting up this port forward, you should be able to go into a terminal on your host machine and ssh <user>@<VM ip>:2222 and reach the machine. For me, the command looked like ssh ubuntu@127.0.1.1:2222.
Th next obvious step, now that you have SSH working, is to start writing (and in my case rewriting) your ansible playbook to start from a “from-scratch” ubuntu machine, getting it to the state you want imperatively. This is actually one of the parts I liked most about [Container Linux’s Ignition system][coreos-ignition] – once you wrapped your head around it, it was a super nice way to bootstrap machines. I even [wrote a post about how to go from bare CoreOS to a Kubernetes cluster with ONLY a hacked together ignition YAML configuration][ignition-k8s-post]. Ignition is a good example of a declarative configuration system, which Ansible is very much not (at this point) – it’s a imperative one that has you telling the machine (via SSH) exactly what to do, hopefully to achieve a state you desire. Ubuntu does have something similar, called [cloud init][cloud-init] (which IIRC CoreOS was originally using before they created Ignition), but Ignition is the more polished tool – maybe I’ll get to using cloud-init at some point (at present Hetzner doesn’t let you pass a cloud init file or pre-baked image to their dedicated machines, however their [cloud offering does][hetzner-cloud-init]).
I noted earlier that it was a “rewrite” of previous code – if that seems confusing, it’s because I was confused when I wrote the earlier code. At that point in time I had not yet properly grasped how to best use Ignition, and didn’t want to go through completely rebuilding the system every time to test whether my ignition config was right, so I actually managed the CoreOS Container Linux machine (and the kubernetes cluster running on it) with Ansible. It’s definitely a possible way to go, but given the amount you can get done with a one-and-done correct-at-construction-time igintion YAML configuration, surely ansible isn’t really quite the right fit for Container Linux. Also, when you’re really comfortable with Hetzner’s rescue mode, it becomes pretty easy to iteratively work on Ignition configs till you get a good one that includes as much as possible.
Anyway, on to the actual playbook writing – make sure to add the VM to your hosts.conf file (or whatever your [ansible inventory][ansible-inventory] file is named). Below, I’ll go through the bits of the ansible playbook I needed to write/rewrite.
There’s a somewhat awkward possibly non-zero period of time from when your server is up to when it has SSH securely enabled, and a possibly longer period of time until it can be managed by Ansible. In my previous container-linux-focused ansible tasks, since there was no package manager, this step looked like me installing statically built versions of [Python][python]/[ActivePython][active-python] and making them available for ansible when ansible connected to the machine. I’ve written a little bit about it [in a previous blog post][install-python-coreos-ansible]. This time the issue is that I DO have access to a package manager (apt), but I still need to install Python before ansible can work in a fully featured manner on the remote system. This is essentially “bootstrapping” ansible, with ansible.
There are two main tricks for this to work:
raw][ansible-raw] to accomplish installing python or ansible and any other pre-ansible work.Of course, there are a ton of assumptions you have to make at this level, otherwise you’re going to have a LOT of obtuse code checking for the OS version and what not – in my case I assume:
These assumptions are true in the local VM environment as well as when I deploy to my Hetzner dedicated server.
One huge issue I ran into was that by default in the VM you can’t sudo WITHOUT inputting the password locally. This problem actually doesn’t exist at “production” time for me, because Hetzner’s Ubuntu 18.04 LTS server setup process handles the /etc/sudoers privileges automatically for you (and takes your SSH public key), but it was a problem in the VM, because it was a basic fresh Ubuntu install. Unfortunately, solving this meant for the VM at least I needed to include a “password”, and feed it to sudo when it needed to be run from the raw command. Even figuring out the terminal magic to send a password to sudo was difficult, and I only figured out with lots of help from an SO post which lead me to another SO post that helped even more.
Here’s what it looked like at the end of the day:
---

#####################
# Passwordless Sudo #
#####################

- name: check for passwordless sudo
  raw: "timeout 1s sudo echo 'check'"
  register: passwordless_sudo_check
  ignore_errors: yes
  no_log: true

- name: create admin group
  when: passwordless_sudo_check["rc"] != 0
  raw: |
    echo {{ ssh_initial_password }} | sudo -Ss &&
    sudo groupadd admins --system || true

- name: add user to admin group
  when: passwordless_sudo_check["rc"] != 0
  raw: |
    echo {{ ssh_initial_password }} | sudo -Ss &&
    sudo usermod -a -G admins {{ ssh_user }}

- name: copy sudoers file, make temporary editable
  when: passwordless_sudo_check["rc"] != 0
  raw: |
    echo {{ ssh_initial_password }} | sudo -Ss &&
    sudo cp /etc/sudoers /etc/sudoers.bak &&
    sudo cp /etc/sudoers /etc/sudoers.tmp &&
    sudo chmod 777 /etc/sudoers.tmp

- name: add admins no passwd rule for sudoers file
  when: passwordless_sudo_check["rc"] != 0
  raw: |
    echo {{ ssh_initial_password }} | sudo -Ss &&
    sudo echo -e "\n%admins ALL=(ALL:ALL) NOPASSWD:ALL" >> /etc/sudoers.tmp &&
    sudo chmod 440 /etc/sudoers.tmp

- name: check and install new sudoers
  when: passwordless_sudo_check["rc"] != 0
  raw: |
    echo {{ ssh_initial_password }} | sudo -Ss &&
    sudo visudo -q -c -f /etc/sudoers.tmp &&c
    sudo cp -f /etc/sudoers.tmp /etc/sudoers

###################
# Ansible install #
###################

- name: check for installed ansible (apt)
  raw: "dpkg -s ansible"
  register: ansible_check
  ignore_errors: yes
  no_log: true

- name: enable universe repository
  when: ansible_check["rc"] != 0
  raw: "sudo add-apt-repository universe"

- name: apt-get update
  when: ansible_check["rc"] != 0
  raw: "sudo apt-get update"

- name: apt-get install software-properties-common
  when: ansible_check["rc"] != 0
  raw: "sudo apt-get install -y software-properties-common"

- name: add apt repo for ansible
  when: ansible_check["rc"] != 0
  raw: "sudo apt-add-repository -y ppa:ansible/ansible"

- name: apt-get update and install ansible
  when: ansible_check["rc"] != 0
  raw: "sudo apt-get update && sudo apt-get install -y ansible"
This code is pretty low-down and dirty but it works (at least it did). One of the best parts about it is that this code just silently falls away (is skipped) when I run in the Hetzner environment because it’s written with just enough robustness to do so.
Normally when managing a fleet of servers with a certain task in mind, you want a base set of programs/tools to be available on all of them. For me, since I’m planning on running a Kubernetes cluster, that means I need some sort of container runtime, external firewally (I like [UFW][ufw]), and a few other things. The list isn’t huge, but I made a common-ubuntu role to handle these necessities.
---
- name: install general packages
  become: yes
  apt:
    name: "{{ packages }}"
    update_cache: yes
    state: present
  vars:
    packages:
    - make
    - libseccomp2
    - apt-transport-https
    - ufw

- name: enable UFW, default reject
  become: yes
  ufw:
    state: enabled
    policy: reject

- name: allow ssh access
  become: yes
  ufw:
    rule: allow
    name: OpenSSH

- name: limit ssh
  become: yes
  ufw:
    rule: limit
    port: ssh
    proto: tcp

# TODO: SSH hardening (fail2ban?)
# TODO: Network hardening -- Mass port closure/ICMP disabling etc.

# This hack is necessary because hetzner sometimes puts in too many nameservers...
# Kubernetes can't deal with this many and will actually error, so we must limit the nameservers to 3
# There just happen to be 3 ipv4 and 3 ipv6 entries
- name: remove ipv6 nameserver entries from /etc/resolv.conf
  tags: ["trim-resolv-conf"]
  become: yes
  replace:
    path: /etc/resolv.conf
    regexp: '^nameserver\s+[a-zA-Z0-9\:]+\s*$'
    replace: ''
    backup: yes
As you can see there are a few TODOs – [fail2ban][fail2ban] is an excellent bruteforce intrusion prevention tool, so it would be a great thing to install, though that would take a bit more work. For now, since UFW offers a LIMIT feature, I’ve gone with that instead.
Jumping ahead tremendously, the last step is more of a hack than normal – Hetzner actually exposes too many nameservers (3 IPv4, 3 IPv6) in the default /etc/resolv.conf file, which Kubernetes actually has a problem with when setting up DNS, because it has to insert a nameserver (it’s own) into the mix.
Now’s the time to start working on an ansible role that will actually install kubernetes on the node, assuming everything else is set up. Headnod to some [kairen/kubeadm-ansible][kairen/kubeadm-ansible], I definitely pulled some inspiration from that repo, more particularly how they invoked kubeadm init. There are lots of little things somewhat unique to my setup (for example the fact that it will allow workloads to be scheduled on master, so [master must be de-isolated by removing a normally-present taint][master-isolation].
Here’s what it looks like, hopefully the steps are sufficiently descriptive:
---

- name: ensure br_netfilter kernel module is available
  become: yes
  modprobe:
    name: br_netfilter
    state: present

- name: install required packages (libseccomp, etc)
  become: yes
  apt:
    name: libseccomp2
    update_cache: yes
    state: present

- name: add google apt signing key
  become: yes
  apt_key:
    url: https://packages.cloud.google.com/apt/doc/apt-key.gpg
    state: present

- name: add google apt repository
  become: yes
  apt_repository:
    repo: deb http://apt.kubernetes.io/ kubernetes-xenial main
    state: present

# Ensure kubernetes requirements are installed
- name: install kubernetes packages
  become: yes
  apt:
    name: "{{ packages }}"
    update_cache: yes
    state: present
  vars:
    packages:
    - "kubelet={{ k8s_version_number }}-00"
    - "kubeadm={{ k8s_version_number }}-00"
    - "kubectl={{ k8s_version_number }}-00"

###########
# kubeadm #
###########

# Below tasks are mostly from https://github.com/kairen/kubeadm-ansible/blob/master/roles/kubernetes/master/tasks/main.yml

- name: check if admin config has been generated
  stat: path={{k8s_admin_config_default_path}}
  register: kubernetes_dir_exists

- name: quit early if kubernetes directory already exists
  fail:
    msg: "kubeadm init artifact @ [{{k8s_admin_config_default_path}}] already exists, quitting early..."
  when: kubernetes_dir_exists.stat.exists

- name: set net.bridge.bridge-nf-call-iptables to 1
  become: yes
  retries: 2
  sysctl:
    name: net.bridge.bridge-nf-call-iptables
    value: 1
    state: present

- name: set net.ipv4.ip_forward to 1
  become: yes
  retries: 2
  sysctl:
    name: net.ipv4.ip_forward
    value: 1
    state: present

- name: disable swap
  become: yes
  shell: swapoff -a

- name: Disable swap permanently (modify /etc/fstab)
  become: yes
  replace:
    path: /etc/fstab
    regexp: '^(.*swap.*)$'
    backup: yes
    replace: '#\1'

- name: run kubeadm init
  become: yes
  shell: |
    kubeadm init --kubernetes-version {{ k8s_version }} \
                 --pod-network-cidr {{ k8s_pod_network_cidr }} \
                 --token {{ k8s_kubeadm_token }} \
                 --cri-socket {{ k8s_cri_socket }} \
                 {{ kubeadm_extra_opts }}
  register: init_cluster

- name: add ~/.kube folder
  tags: ['post-kubeadm']
  file: path="~/.kube" state=directory

- name: update permissions for admin.conf
  tags: ['post-kubeadm']
  become: true
  file: path=/etc/kubernetes/admin.conf mode=0775

- name: copy admin.conf to remote user's home directory
  tags: ['post-kubeadm']
  copy:
    src: "{{ k8s_admin_config_default_path }}"
    dest: "~/.kube/config"
    owner: "{{ ansible_user }}"
    group: "{{ ansible_user }}"
    mode: 0655
    remote_src: yes

- name: remove master taint to allow workloads to be run on master
  tags: ['post-kubeadm']
  shell: "kubectl taint nodes --all node-role.kubernetes.io/master-"
  when: k8s_allow_workloads_on_master
  ignore_errors: yes # if this runs again after the taint might already be gone

- name: copy admin.conf to local machine
  tags: ['post-kubeadm']
  fetch:
    src: "{{ k8s_admin_config_default_path }}"
    dest: "../secrets/kubernetes/clusters/godzilla"
    owner: "{{ ansible_user }}"
    group: "{{ ansible_user }}"
    mode: 0655
    remote_src: yes

- name: Enable and restart kubelet engine
  tags: ['post-kubeadm']
  become: yes
  systemd:
    name: kubelet
    daemon_reload: yes
    state: restarted
    enabled: yes
  register: started_kubelet

####################
# Firewall Updates #
####################

- name: Allow kubernetes API traffic on 6443
  become: yes
  tags: ['post-kubeadm', 'firewall-opening']
  ufw:
    rule: allow
    port: 6443
    proto: tcp

- name: Allow traffic on 443 (HTTPS)
  become: yes
  tags: ['post-kubeadm', 'firewall-opening']
  ufw:
    rule: allow
    port: 443

- name: Allow kubernetes API traffic on 80 (HTTP)
  become: yes
  tags: ['post-kubeadm', 'firewall-opening']
  ufw:
    rule: allow
    port: 80

- name: Allow all access from RFC1918 networks to this host
  tags: ['post-kubeadm', 'firewall-opening']
  ufw:
    rule: allow
    src: '{{ item }}'
  with_items:
    - 10.0.0.0/8
    - "{{ hostvars[inventory_hostname]['ansible_default_ipv4']['address'] }}"

- name: Allow all access to RFC1918 networks from anywhere
  tags: ['post-kubeadm', 'firewall-opening']
  ufw:
    rule: allow
    dest: '{{ item }}'
  with_items:
    - 10.0.0.0/8
    - "{{ hostvars[inventory_hostname]['ansible_default_ipv4']['address'] }}"
Pretty long and somewhat disorganized, but functional! Note the use of some [ansible tags][ansible-tags] to make it easier to perform certain bits without doing the rest (very useful during testing). As you can see, there’s a bit of setup that needs to be done before kubeadm init can be run, though this is of course somewhat specific to my use case.
Standard practice is to install kubernetes networking directly after installing the cluster (and in the case of a simple [Flannel][flannel] install, before). Generally when I deal with Kubernetes networking I choose one of two tools – [Canal][canal] ([Calico][calico] + [Flannel][flannel]) or [kube-router][kube-router]. kube-router is the newer project, but it feels lighter to me, and removes the requirement of [kube-proxy][kube-proxy] while providing all the features I care about, and leveraging some newer [LVS/IPVS][lvs-ipvs] linux features (where traditionally kube-proxy would use iptables) which I like. By this point in time kube-proxy also supports IPVS instead of iptables, but I still use kube-router when I can. If I ever have problems with it I fall back to Canal since it’s the more battle-tested option.
As far as installing these with ansible, I put them into their own roles, and created both in order to be able to choose whichever I wanted to run on. I ended up going with kube-router for this cluster so here’s what that looks like:
---
- name: copy over kube-router makeinfra code
  copy:
    src: kube-router/
    dest: ~/kubernetes/kube-router/

- name: copy over kubeconfig for kube-router to use
  become: yes
  copy: src=/etc/kubernetes/admin.conf dest=/var/lib/kube-router/kubeconfig remote_src=yes

- name: download cni binaries (v{{ cni_version }})
  tags: ["cni"]
  become: yes
  get_url:
    url: "{{ cni_url }}"
    checksum: sha512:{{ cni_sha512_checksum }}
    dest: /tmp/cni.tar.gz

- name: ensure /opt/cni/bin is present
  tags: ["cni"]
  become: yes
  file: path=/opt/cni/bin state=directory

- name: unzip cni binaries to /opt/cni/bin
  tags: ["cni"]
  unarchive:
    src: /tmp/cni.tar.gz
    dest: /opt/cni/bin
    remote_src: yes

- name: copy over cni config for kube-router
  become: yes
  tags: ["cni"]
  template: src=10-kuberouter.conflist.j2 dest=/etc/cni/net.d/10-kuberouter.conflist

- name: install kube-router
  make:
    chdir: ~/kubernetes/kube-router

- name: disable kube-proxy
  tags: ['disable-kube-proxy']
  shell: "kubectl -n kube-system delete ds kube-proxy"
  ignore_errors: yes

- name: download kube-proxy binary
  tags: ['disable-kube-proxy']
  get_url:
    url: "{{ kube_proxy_binary_url }}"
    checksum: sha256:{{ kube_proxy_sha256_checksum }}
    dest: /tmp/kube-proxy
    mode: 0755

- name: cleanup kube-proxy's mess
  become: yes
  tags: ['disable-kube-proxy']
  shell: "/tmp/kube-proxy --cleanup"
  ignore_errors: yes
The “makeinfra code” referred to in the first task is just the Kubernetes resource descriptions (ex. kube-router.serviceaccount.yaml, kube-router.ds.yaml, kube-router.svc.yaml, etc). The rest of it is pretty obvious, but one thing I had a super hard time finding was a binary distribution for kube-proxy, JUST so I could run the --cleanup subcommand. The kube-router docs suggest that you use docker to run the container (i.e. docker run --privileged ..... --cleanup), but I actually DON’T have docker installed at all, on the machine, since I’m using containerd. Unfortunately, containerd/runc’s ergonomics are attrocious and it’s kind of a pain to run images in that way – I just don’t know how and have no desire to learn at present. Since the cleanup tool needs to do stuff at the machine level, I just downloaded the binary for kube-proxy and ran it in a regular shell, rather than a privileged container.
Here’s what the kube_proxy_binary_url and related variables worked out to (from the group_vars/playbook.yaml file):
k8s_version_number: "1.11.1"
kube_proxy_binary_url: "https://storage.googleapis.com/kubernetes-release/release/v{{k8s_version_number}}/bin/linux/amd64/kube-proxy"
kube_proxy_sha256_checksum: 36a86e101435cc3f7087ffad2dc7052f9e49c4d5ee3309b21d1ec3d8966f3cee
This configuration is a bit awkward, because the checksum is obviously pinned to one version (1.11.1) but if you look at the other variables everything seems dynamic. This means as soon as I change the version number the related tasks would fail (because the checksum would fail). For now I’m going to leave it and deal with the next new version in ~6 months time. You can also find the rest of the related files from the steps in the gitlab repository at the end of the post, I’ve included the full working example extracted from my work there.
The rest of the stuff the cluster needs, [cert-manager][cert-manager] for TLS, [prometheus][prometheus] for metrics, etc will be installed using my makeops/makeinfra approach – I basically go into the kubernetes subfolder of a general -infra project run make and all the kubernetes resources get created like I like them.
The plays/tasks I’ve laid out above are laid out with the benefit of hindsight – I developed them iteratively, sending commands and trying plays against the local VM. It took many tries to get the playbook to the state you see above. Here are some resources that helped me along the way:
debug pseudo taskshell, get_url, copy etcNote that once you have the cluster up and installed, you’ll need to actually port-forward port 6443 to ensure that you can send kubernetes commands with kubectl to the VM, AND you’ll need to copy admin.conf (usually @ /etc/kubernetes/admin.conf) from the master node! It’s not mentioned above but I created a role that copies out the admin.conf generated by kubeadm – it’s in the [repo I stuffed the code in][gitlab-repo], which is mentioned again at the bottom of this post.
After you can get the local VM to a functioning Kubernetes single node cluster, you’re (theoretically) done! Nice safe experimentation finished, time to take our starry eyed optimism to production!
Well the careful testing against the local VM paid off! All the VM-specific code (sudo stuff) was skipped as I expected, and with some minor tweaks all the software was installed as expected, along with the single-node kubernetes cluster! As it usually goes though, there were a bunch of issues after that point, which I’ll go into in the next section.
All in all, it was a good idea (obviously) to try everything out on a local VM first.
Hopefully since it happened to me you won’t have to go through this, but right after I got the cluster up in production and installed all my usual kubernetes resources, I realized that things weren’t working. The cluster was up, pods were running, everything looked fine, but there were failures happening that I didn’t realize. I hadn’t tested enough on the VM – I needed to test actually deploying the stuff I want to run to the cluster as well and seeing how it fared.
The tl;dr of what went wrong was in this order:
kube-router/canal--service-cidr to kubeadm was making services unfindable, kubeadm seems to just use the default 10.96.0.0/12 no matter what./etc/resolv.conf – literally the file had 6 nameserver <ipv4 | ipv6> lines, and kubernetes needs to inject it’s own (the address of cluster [CoreDNS][coredns]/[kube-dns][kube-dns]), so it couldn’t.nginx-ingress-controller][nginx-ingress-controller] which caues failures in [cert-manager][cert-manager], which meant it couldn’t run HTTP01 challenges and get TLS certshostPath volumes :(ufw) allowed traffic to/from 10.0.0.0/8One good thing that came out of this was that I ended up taking this time to try out [Traefik][traefik] as my ingress controller instead and am pretty happy with it, the dashboard it comes with is pretty awesome.
I’ll spare you the item-by-item breakdown of what went wrong – you can find the working (at least for now) code in the repo pointed to in the Wrapup section!
Here’s the repo repository AFTER all the hard work – it basically takes a Hetzner default-started Ubuntu 18.04 LTS server from 0 to single node kubernetes cluster, with credentials included in the repo via git-crypt (the key is also in the repo so you can see how it works)
[ansible-hetzner-ubuntu-1804-k8s-setup Gitlab Repo][gitlab-repo]
If you’re crazy enough to take a dedicated machine you have on hetzner try this out, please let me know if/how it works for you!
It was great to come back to Ansible and find that it’s the same stable & predictable tool that I felt when I first used it! It got a little hacky at times but I’m really happy with how well everything worked once it was time to deploy to “production”. The issues I ran into were mostly self-inflicted and/or avoidable, and the right way to mitigate them would have been to be even more careful about the handover, making sure to stand up the working cluster first THEN move things over. Even with what I thought was a reasonably careful approach I still had significant downtime (it took me a few days to figure out the networking/dns/firewall issues)… Obviously that’s just not going to cut it in a real production environment.
I like to think I do know what I would do in a production system though – get a new system (budget permitting), run this process on that, then use kubectl drain to try and get all the resources over, which would be a longer but safer process. Either way, prototyping the ansible playbook cut down my time to functional a LOT though, especially since I don’t have to do any server setup myself – just reset the hetzner server and point ansible at it. I did save myself some downtime while I would have been figuring this stuff out if I just reset the server cold-turkey.
Another tool in my arsenal that I’m continuously impressed with using was git-crypt – by using it, I can actually (theoretically) open source the infrastructure code (ansible roles, kubernetes resources, scripts), while keeping the secrets and/or generated artifcats (like admin.conf for a particular kubernetes cluster)safe in-repo. That’s pretty awesome. I’m not 1000% sure all my sensitive stuff is sufficiently protected currently so I’m not going to open source my infra setup just yet though :)
It was a bunch of work and there were a few unexpected twitsts but in the end I completed yet another install of Kubernetes, this time on Ubuntu 18.04 LTS, and I’m looking forward to leveraging all the ease-of-use that comes with picking Ubuntu Server. Can’t wait to get started working on integrating/using lxd, kata-runtime, kubevirt, and other similar untrusted workload kubernetes projects.
[ubuntu-server-download]: https://www.ubuntu.com/download/server) [VT-x]: https://en.wikipedia.org/wiki/X86_virtualization#Intel_virtualization_.28VT-x.29 [bios]: https://en.wikipedia.org/wiki/BIOS [wiki-nat]: https://en.wikipedia.org/wiki/Network_address_translation [coreos-ignition]: https://coreos.com/ignition/docs/latest/ [ignition-k8s-post]: /post/yet-another-cluster-reinstall-back-to-container-linux/ [ansible-inventory]: https://docs.ansible.com/ansible/2.4/intro_inventory.html [python]: https://www.python.org/ [install-python-coreos-ansible]: /post/installing-python-on-coreos-with-ansible/ [ansible-raw]: https://docs.ansible.com/ansible/latest/modules/raw_module.html [ufw]: https://wiki.archlinux.org/index.php/Uncomplicated_Firewall [fail2ban]: https://www.fail2ban.org/wiki/index.php/Main_Page [kairen/kubeadm-ansible]: https://github.com/kairen/kubeadm-ansible/ [master-isolation]: https://kubernetes.io/docs/setup/independent/create-cluster-kubeadm/#master-isolation [ansible-tags]: https://docs.ansible.com/ansible/latest/user_guide/playbooks_tags.html [kube-router]: https://github.com/cloudnativelabs/kube-router [canal]: https://docs.projectcalico.org/v3.1/getting-started/kubernetes/installation/flannel [calico]: https://docs.projectcalico.org/v3.1/getting-started/kubernetes/installation/calico [flannel]: https://github.com/coreos/flannel [coredns]: https://coredns.io/ [kube-dns]: https://github.com/kubernetes/dns [nginx-ingress-controller]: https://github.com/kubernetes/ingress-nginx [traefik]: https://docs.traefik.io/user-guide/kubernetes/ [cert-manager]: https://github.com/jetstack/cert-manager/ [gitlab-repo]: https://gitlab.com/mrman/ansible-hetzner-ubuntu-1804-k8s-setup [vokoscreen]: http://linuxecke.volkoh.de/vokoscreen/vokoscreen.html [vokoscreen-donate]: http://linuxecke.volkoh.de/vokoscreen/vokoscreen-donate.html [vokoscreen-download]: http://linuxecke.volkoh.de/vokoscreen/vokoscreen-download.html [cloud-init]: https://help.ubuntu.com/community/CloudInit [hetzner-cloud-init]: https://wiki.hetzner.de/index.php/CloudServer/en#Can_I_use_Cloud-Init_when_creating_servers.3F [ymmv]: https://www.urbandictionary.com/define.php?term=ymmv [coreos-redhat-acquisition]: https://www.redhat.com/en/about/press-releases/red-hat-acquire-coreos-expanding-its-kubernetes-and-containers-leadership [coreos-rolled-into-openshift]: https://coreos.com/blog/coreos-tech-to-combine-with-red-hat-openshift [techjobs.tokyo]: https://techjobs.tokyo [kubernetes]: https://kubernetes.io/docs/home/?path=users&persona=app-developer&level=foundational [wiki-port-forwarding]: https://en.wikipedia.org/wiki/Port_forwarding [active-python]: https://www.activestate.com/activepython [kube-proxy]: https://kubernetes.io/docs/admin/kube-proxy/ [lvs-ipvs]: https://en.wikipedia.org/wiki/Linux_Virtual_Server [prometheus]: https://prometheus.io/